To setup an email account on Outlook 2013:
2. Click Add Account.
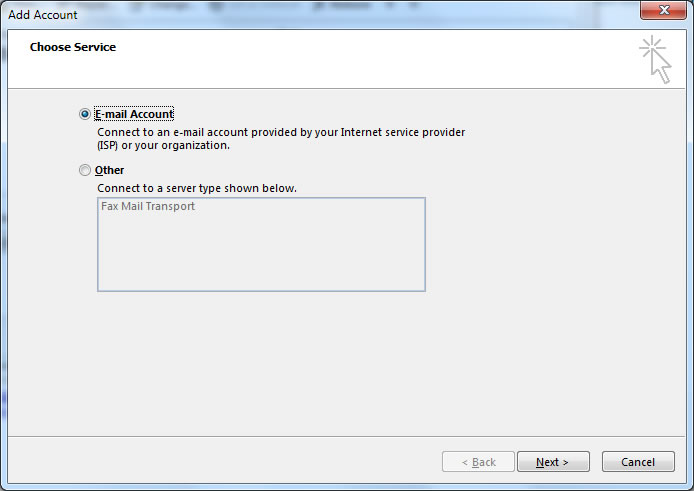
3. Select the E-mail Account option from and click [Next].
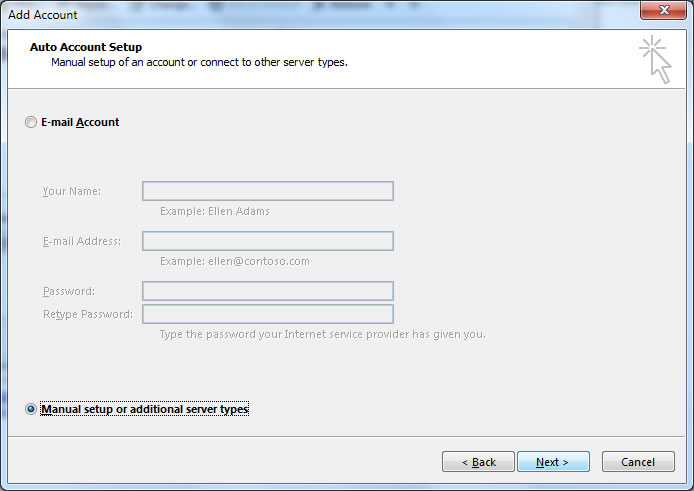
4. Select the Manually setup or additional server types option on the bottom, click [Next].
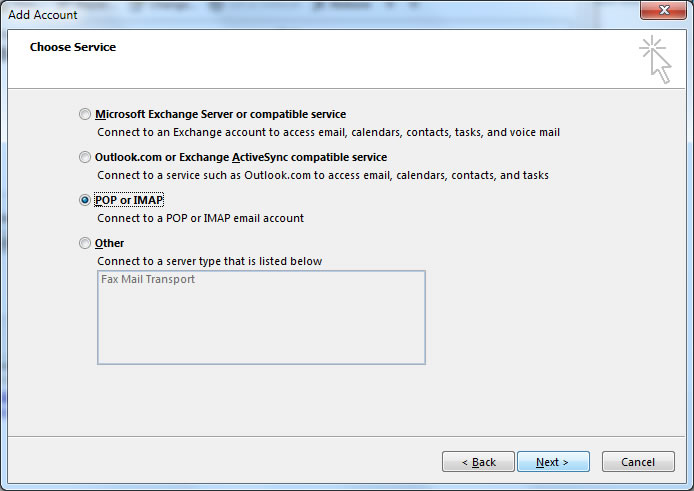
5. Select POP or IMAP email account type and click [Next]:
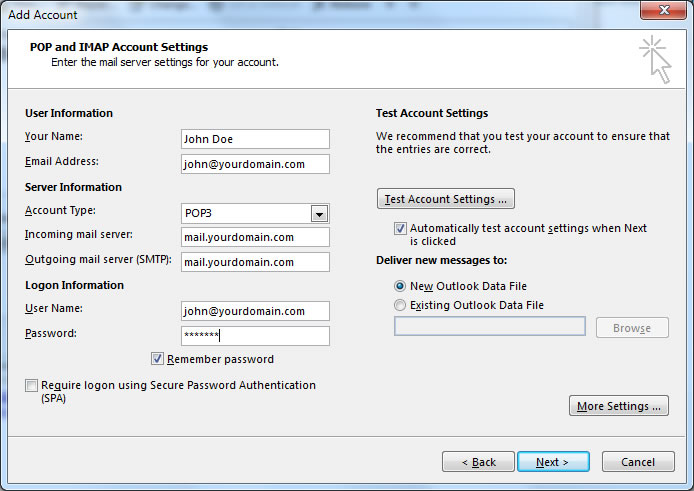
6. Insert your Internet Email Settings
Your Name: The name you wish displayed when people recieve your emails
Email Address: The email address you are sending email from.
Account Type: POP3
Incoming mail server: mail.yourdomain.com.
Outgoing mail server: mail.yourdomain.com or your Internet Service Provider’s (ISP) outgoing mail server.
Username: The email address you are sending email from.
Password: The password used for this email account and select the remember password option.
7. Click More Settings
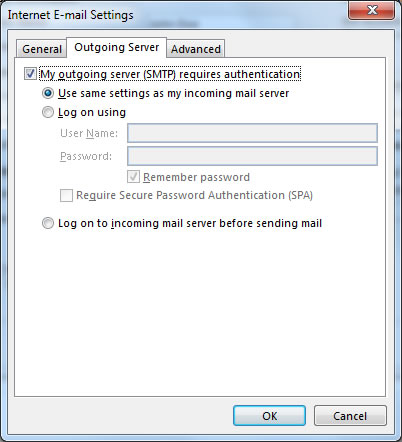
8. Click the Outgoing Server tab and select the My outgoing server requires authentication setting.
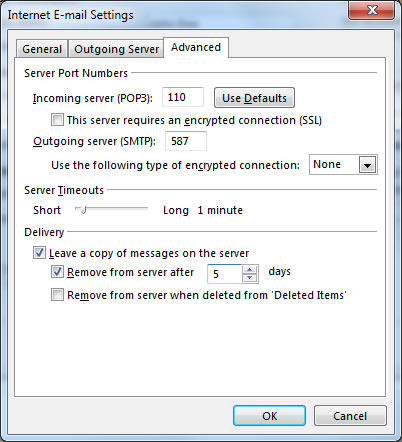
9. Click the Advanced tab and set the Outgoing mail / SMTP port to 587.
10. Click the Ok, Next and Finish.
